

### Blog Post:
Thrift flip furniture is the most practical way to turn a solid-wood bargain into side income—without huge risk or complicated tools. If you want a reliable system to start making real profit, this no-fluff, stepwise guide covers everything most tutorials miss: costs, safety, finishing, and profit strategies.
Key Takeaways
- Beginner thrift flip furniture projects cost $55–$150 to finish and typically earn $80–$200 net profit per item, with high re-sale potential on dressers, nightstands, and tables.
- Most failures are due to skipped repair steps, hasty paint jobs, poor cost-tracking, or undervaluing inventory.
- Clear safety protocols, step-by-step finishing (especially chalk/milk paint), and profit tracking are musts for repeatable success.
- Why Thrift Flip Furniture Is a Viable Side Hustle
- A Step-by-Step Guide to Profitable Flips
- Advanced Analysis & Common Pitfalls
- Conclusion
- FAQs
Why Thrift Flip Furniture Is a Viable Side Hustle
Flipping thrift furniture is a proven small business model for busy parents, students, or hobbyists who want real extra income without a huge time investment. You hunt local thrift stores, estate sales, or curbside finds for real-wood pieces—usually available for $30–$80. Materials (think chalk paint or milk paint, knobs, sandpaper, wax) run $15–$40. Add $10–$30 for transport or delivery, and you’re looking at a total outlay of $55–$150 on your first flip.
Resale values are strong and reliable: expect $150–$350 for dressers, $60–$150 for nightstands or side tables, and $150–$400 for dining tables. This typically brings in $80–$200 net profit per item. Many part-timers earn $300–$900 a month flipping one to three pieces as a side hustle, while consistent flippers can net $1,200–$3,500 with 4–8 flips.
What sets profitable flippers apart is not just creativity, but following a process: sourcing smart, prepping right, finishing for durability, and tracking costs. The best part? Basic DIY skills are enough—you don’t need a shop or pro tools (source).
A Step-by-Step Guide to Profitable Flips
Follow this process for every thrift flip furniture project, and you’ll avoid the top reasons beginners lose money.
-
Sourcing & Inspection
- Shop during store restocks (early weekday mornings or day after curb alerts).
- Inspect for all-wood construction, dovetail drawers, tight joinery, and minimal damage.
- Measure exact dimensions for future listings.
- Walk away if pricing is over $80 for basic pieces or if repairs would require power tools or significant wood replacement.
- Run a quick profit check: Estimated resale minus (purchase + $40 + transport). If your potential profit is less than $80, wait for a better find.
-
Transportation & Inventory Turnover
- Use furniture pads or moving blankets to avoid dings in transit.
- Befriend a neighbor with a van or rent for $25 per day to control transport costs (source).
- Store pieces off the floor in a dry room; inventory that sits beyond 3 weeks risks draining cash flow—if unsold after 30 days, mark it down or donate.
-
Essential Prep & Structural Repairs
- Clean deeply; then tighten all screws, reinforce loose joints with wood glue and clamps.
- Fix veneer chips with wood filler or CA glue; realign and lubricate drawer tracks.
- Always sand thoroughly with 120 grit (then 180/220), following the wood grain, before any painting.
-
Finishing (Primer → Paint → Seal)
- Prime bare or stained wood with stain-blocking primer. Let dry fully.
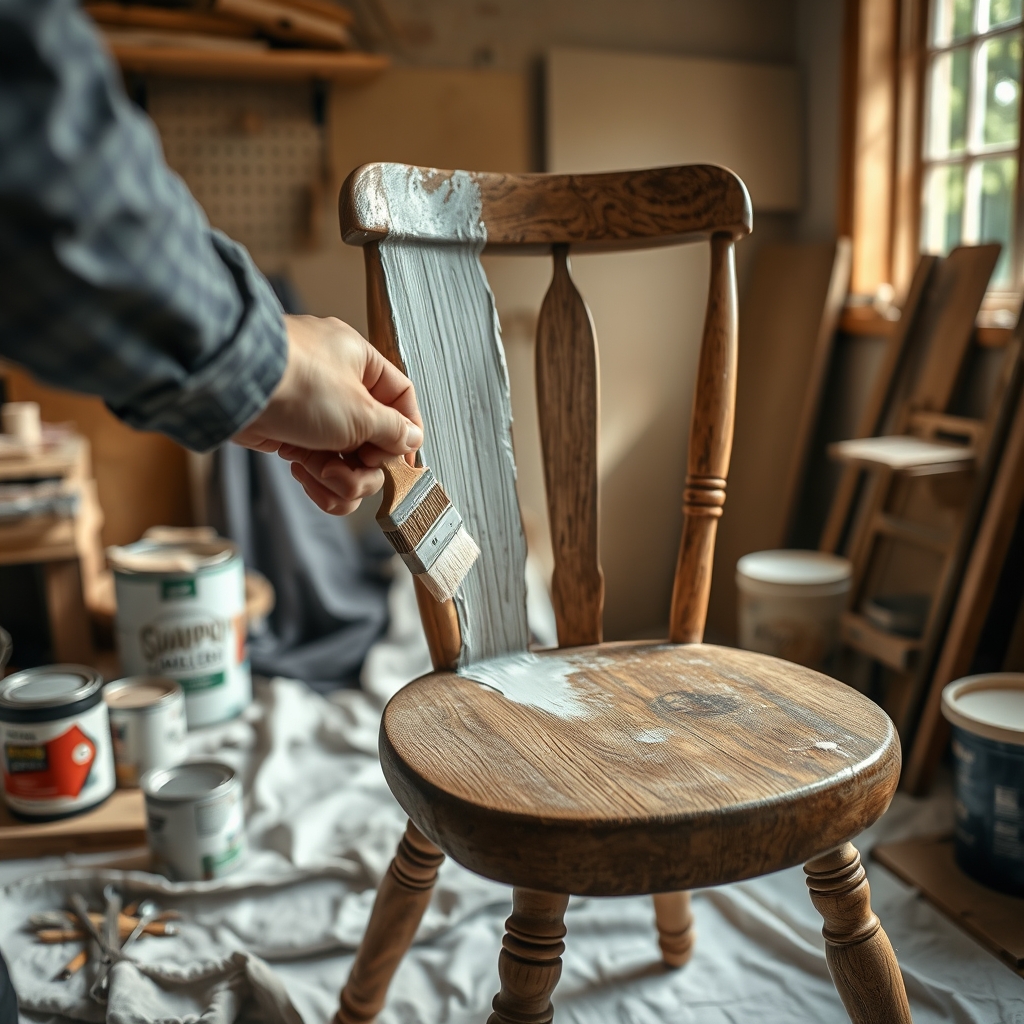
- Apply paint (chalk or milk paint recommended): two to three thin coats. Sand lightly with 220 grit between coats for a velvety finish.
- Once paint is dry, seal with clear wax (for chalk paint) or a poly topcoat (for milk paint). Buff wax after 30 minutes and allow two to five days to fully cure in a ventilated area.
- Never use paint or finish indoors without airflow and PPE (mask, gloves, open windows—or a box fan if possible).
-
Final Details
- Swap knobs for new or vintage ones ($15–$40 investment, $30–$80 value added).
- Reupholster seats if needed—use staple gun and mid-grade fabric.
- Check for missing feet or wobbly legs and fix before marketing.
-
Photos & Listings
- Shoot in natural light against a clutter-free background. Capture all angles and close-ups of finish and hardware.
- Write an honest, upbeat listing. List measurements, mention structural repairs, and describe the finish process.
- Set price by adding: (cost basis + time value) × 1.5 (aim for 30–50% above cost + time so you have room to negotiate).
-
Handling Buyers
- Ask for a partial deposit (half the amount) before holding. Schedule pickups within 12–24 hours to avoid no-shows.
- Have templates ready for common messages and follow up with backups if a buyer ghosts.
-
Profit Tracking
- Use a simple worksheet (see Resources section below) to log all costs, time spent, and final sale.
- If your profit is under $80 or if your last few flips haven’t sold within two weeks, review your process for bottlenecks.
Mini Case Study: Nightstand Flip
- Buy price: $35 at local thrift
- Supplies: $18 (chalk paint, brush, wax, new knob)
- Transport: $10
- Prep & repair: sanded and tightened one leg, 30 minutes
- Total cost: $63, 2 hours work
- Sold for: $120 on Facebook Marketplace
Profit: $57. Sold within 3 days—buyer paid 50% deposit up front after clear, honest photos and detailed listing description.
Mini Case Study: Dresser Flip
- Buy price: $65
- Supplies: $27 (milk paint, primer, vintage brass pulls)
- Transport: $20
- Repair: fixed two dresser drawers, sand/fill chips, 3 hours
- Total cost: $112, 4.5 hours work
- Sold for: $260 after 7 days of listing, with a $50 deposit collected
Profit: $148, not counting time. Good result, but compare your hourly rate to your other sources of side income to keep it worthwhile. For details on adding value with new hardware, see our rental renovation guide.
Mini Case Study: Dining Table Flip
- Buy price: $70 from estate sale
- Supplies: $35 (milk paint, topcoat, sanding discs)
- Transport: $25 (borrowed truck/gas)
- Repair: re-glued joints, sanded top, 5 hours
- Total cost: $130, 6 hours work
- Sold for: $325 after negotiating with two parties (deposit used to hold)
Profit: $195. Multiple interested buyers helped avoid a no-show and kept price close to market comps. For more tips on managing offers and maximizing ROI, see our guide to project planning.
For a ready-to-use cost worksheet, finishing checklist, and price calculator, see the Resources & Templates below—or download our systematic sourcing calendar to never miss thrift restock days again.
Advanced Analysis & Common Pitfalls
Most new thrift flip furniture flippers lose their shirt on the first few tries—not because of bad taste, but avoidable mistakes. Here’s how they happen and how you can outsmart them every time:
| Pitfall | Symptom | Immediate Fix |
|---|---|---|
| Overpaying for pieces | Profit margin drops below $80, forced to sell low | Stick to $80 max for entry-level flips, use profit formula before checkout |
| Skipping prep/repairs | Paint peels, drawers jam, buyers return or leave bad reviews | Always tighten, clean, sand, and repair before paint. No shortcuts! |
| Believing “no-prep” paint claims | Mismatched adhesion, flaking finishes after one month | Always scuff sand and clean thoroughly, even with chalk/milk paint |
| Poor safety practices | Headaches or irritation during/after painting | Only paint in ventilated areas. dust mask and gloves are non-negotiable |
| Inventory stagnation | Pieces sit for weeks or months, funds tied up | Price to sell (with margin!) and mark down after 21 days unsold |
| Lack of cost tracking | Missed small expenses eat profit, difficulty setting price | Log every cost, even travel and cleaning, in your worksheet |
| Lackluster listings/photos | Poor sales interest, low-ball offers, repeated no-shows | Shoot in natural light, list clearly, require up-front deposits |
For more in-depth troubleshooting and decision trees for walkaway points, reference our comprehensive guide to upcycling mistakes.
Further reading:
full profit breakdown,
seller logistics tips
Conclusion
Thrift flip furniture is a practical, repeatable side hustle with high ROI—if you stick to cost-aware buying, honest prep work, and disciplined process. Tracking your true cost basis, mastering finishing protocols, and dealing directly with buyers will set your flips apart in any local market.
Ready to start your first project? Download the free worksheet and checklists below, keep your buy price conservative, source pieces with strong resale trends, and give each flip a photo-to-sale plan. Build your confidence; with every sale, your margins (and skill) will grow.
Need inspiration for rental-space upgrades? See our top rental-friendly renovation tactics for more ideas.
FAQs
What’s the best paint for thrift flip furniture if I’m a beginner?
Chalk paint or milk paint work well for most furniture upcycling ideas. They’re easy to apply, hide brush strokes, and allow for quick touch-ups. But always sand and use a primer if there’s any gloss or old finish to ensure durability. Top with wax (for chalk paint) or a water-based sealer (for milk paint).
How do I avoid no-shows and wasted time with buyers?
Ask for a 50% deposit before holding an item, and schedule pickups within 24 hours. Always keep a backup buyer on standby, and update all interested parties if the deal falls through. For more details, see this real-world seller logistics guide.
How can I accurately price my thrift flip furniture?
Add your full cost basis (purchase, transport, supplies, repairs), then add your time value (usually $20–$25 per hour for part-timers). Compare to similar sold comps in your area, and aim for a total profit of at least $80 per item. Use our profit worksheet template for calculations.
What are essential safety steps when painting or sanding?
Always work in a ventilated area (open door, windows, or use a fan). Wear a dust mask when sanding and gloves when applying paint or wax. Never use chemical strippers or oil-based products in an enclosed area. For a full safety checklist, see this guide.
Do I need to seal chalk paint or milk paint every time?
Yes, especially for any surface that gets real use (tops, seats, sides). Use wax for chalk paint and a clear water-based poly for milk paint. Don’t skip buffing and allow for curing time before sale—durability is a selling point for buyers.
Resources & Templates (Downloadable)
- Free Profit Worksheet: Track every cost and see your true margins
- Step-by-Step Finishing Checklist: Never skip a crucial step again
- Ready Messaging Templates: Avoid no-shows with pro text responses
- Pricing Calculator: Set the right price and profit every time
- Sourcing Calendar: Plan for store restock days and never miss a deal
Want more cheap furniture makeover ideas for tight budgets? See our flagship rental renovation article or browse the furniture upcycling ideas library.
—